n2n is an open source Layer 2 over Layer 3 VPN application which utilises a peer-to-peer architecture for network membership and routing.
Some details can be found in https://www.ntop.org/products/n2n/.
N2N communication method
- Edge node <-> Super node <-> Edge node
- Edge node <-> Other edge nodes <-> Edge node
- Edge node <-> Edge node
Method 3 is a direct connection, and data will not pass the super node. This is the most ideal way.
Deploy Super Node in your VPS (Ubuntu 16.04)
Compile your N2N:
1 | git clone https://github.com/meyerd/n2n.git |
Start your super node, listen port is set as 6666:
1 | supernode -l 6666 |
Configure Your Windows Client
Download a client from https://file.bugxia.com/s/b6MAp6LS78b6XBp.
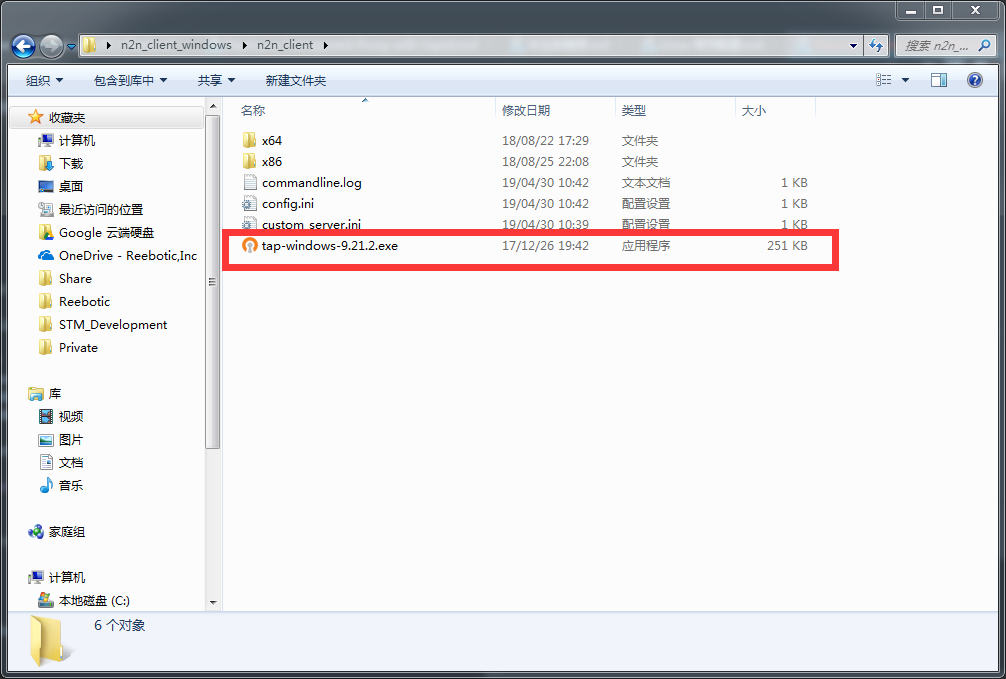
Install TAP Adapter

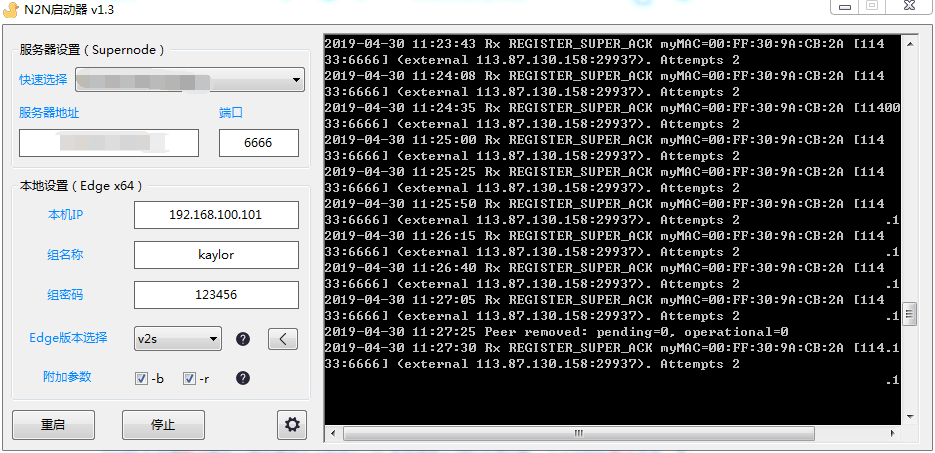
Configure Client

服务器地址: Server IP
端口: Port
本机IP:Local IP
组名称:Group
组密码:Password
Configure Your MAC Client
Compile your N2N:
1 | git clone https://github.com/meyerd/n2n.git |
Modify n2n/n2n_v2/CMakeLists.txt.
CMAKE_C_FLAGS and CMAKE_CXX_FLAGS append -I/usr/local/opt/openssl/include -L/usr/local/opt/openssl/lib1
2
3
4mkdir build
cd build
make
sudo make install
modify your ~/.bash_profile and append a new line: export PATH=$PATH:/usr/local/sbin/
Using n2n on MacOS
In order to use n2n on MacOS you need to first install support for the tap interface.
if you are a brew (https://brew.sh) user you can do it in a couple of steps
- brew tap homebrew/cask
- brew cask install tuntap
Note that in the latest OS versions (for instance MacOS High Sierra), you may need to
need to enable their kernel extension in
System Preferences → Security & Privacy → General
Start Your Client
1 | sudo edge -d n2n0 -c kaylor k 123456 -l your_server_ip:6666 -a 192.168.100.200 -b -r |